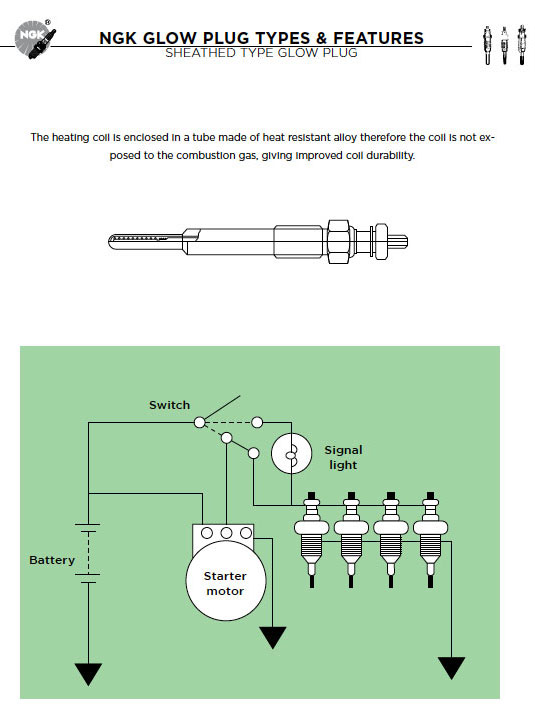
The Glow Plug
 How they work
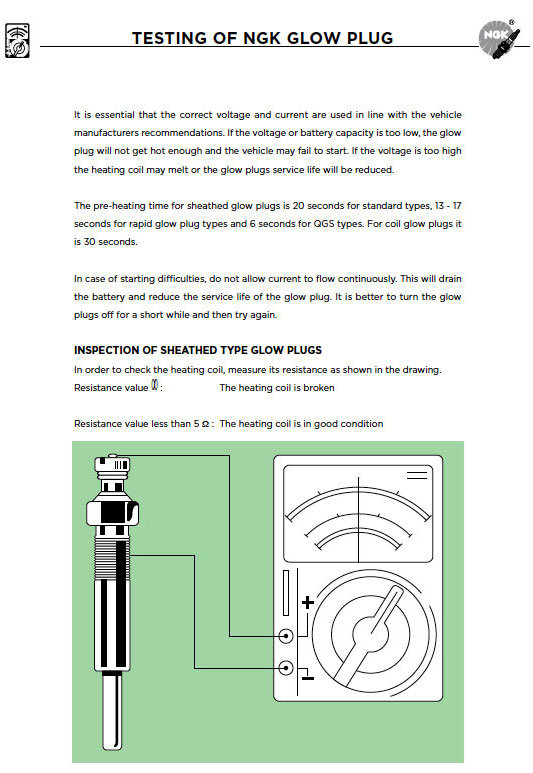
Use electric source of correct voltage and current as specified by the manufacturer. The glow plug will not be hot enough and may fail to start the engine when the voltage or the battery capacity is too low. When the voltage is too high, the coil may be burnt or the plug life may be affected.
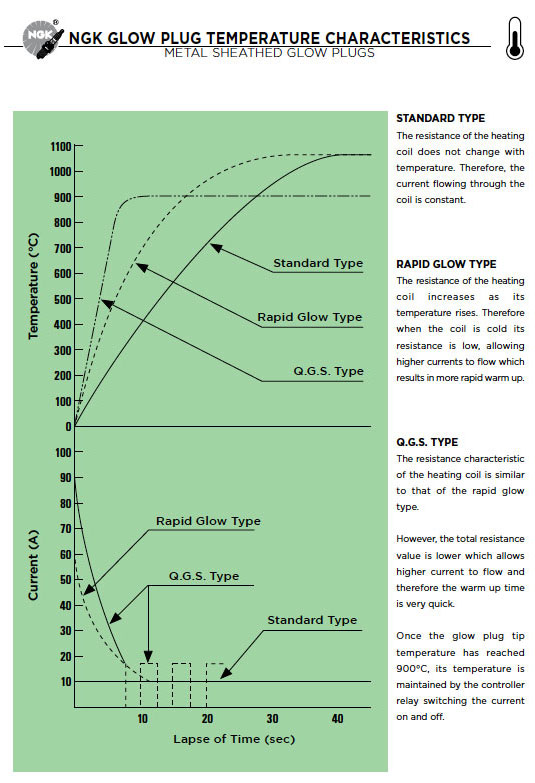
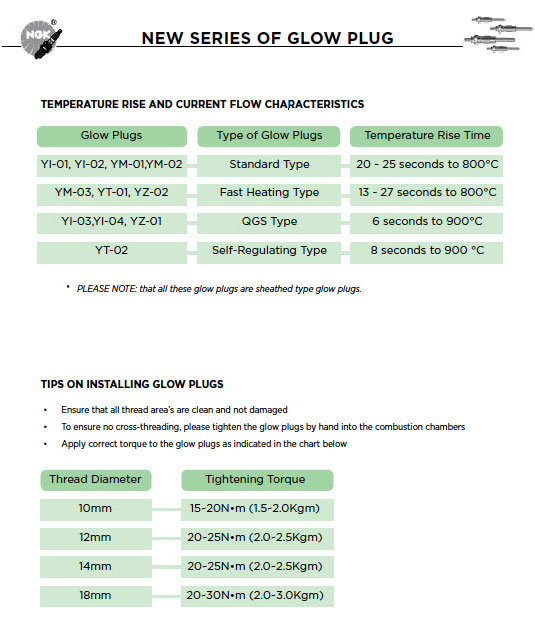
The pre-heating time for sheathed glow plug is approximately 30 seconds for ordinary type, 13 to 17 seconds for the fast heating type, and about 6 seconds for the QGS type.
Prolonged pre-heating should be avoided since it will shorten the life of battery and the plug. When the engine fails to start, turn off the switch once, and pre-heat the plug again.
Installation of glow plug must be, at first, finger tightened. Once the glow plug has been finger tightened, the plug must be tightened with the specific torque as shown below:
| Thread Diameter | Tightening Torque |
| 10 mm | 15 ~ 20N.m |
| 12 mm | 20 ~ 25N.m |
| 14 mm | 20 ~ 25N.m |
| 18 mm | 20 ~ 30N.m |

Trouble Tracing
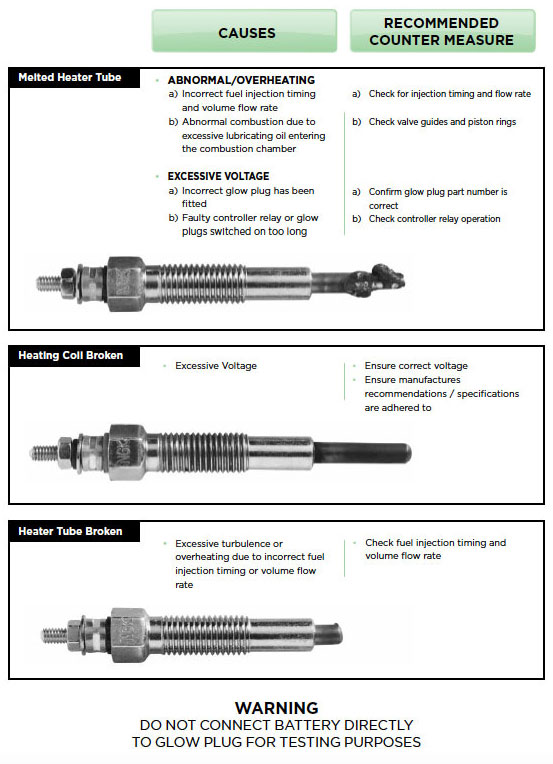
In case of poor starting, check the following:
- First check the glow signal (glow indicator) on the instrument panel.
- If any sheathed plug is broken, the indicator will take a long time to glow.
- If there is the short-circuit, the indicator will glow quickly and will burn.
- If uncertain, remove the glow plug for visual checking, measure its resistance with a tester, or apply the rated voltage indicated on its hexagon to check for heating. (Don’t apply battery 12V or 24V directly)
- Heating Element Breakage (Infinite Resistance or Non-Heating). Before replacing, check to see if the glow plug was wired properly. Also check with a tester to see if excess voltage has been applied to each glow plug.
- Short-circuit or Resultant Breakage. Before replacing, repair any damaged part of the wiring.
NGK Glow plug types and features 1
NGK Glow plug types and features 2
NGK Glow plug Temperature characteristics
Testing NGK Glow plug 1
New series of NGK Glow plugs
Testing NGK Glow plug 2
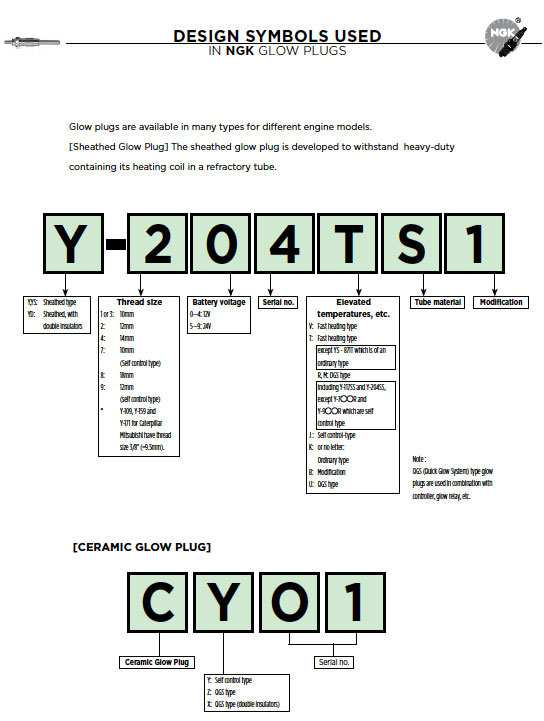
Design symbols used
Techniwiki
Online training and instruction videos at your fingertips.
Featured
Contact Us
To contact us either use the link below or the following address:-
P.O. Box 8156, Elandsfontein, 1406
Tel: 0861 835 645
© 2023 Niterra. All rights reserved